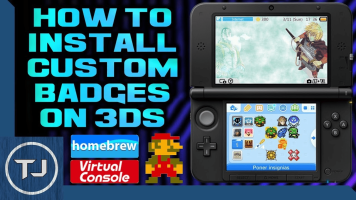
Video Guide
Introduction
This thread will guide you through on how to get any official badge you could possibly think of, and also how to group each badge into sets.
Setup
Before starting, you're going to need a few things:
Assumptions
This guide assumes the following:
Getting the arm9 bootrom
This will be needed for the allbadge tool, as it is required for decrypting some files.
file should now be on your SD card inside of
.
Getting the badges
Having obtained the arm9 bootrom, you can now use the Allbadge Tool.
Installing Simple Badge Injector and knowing your NNID
To inject any badges, you will need to know your NNID.
Creating badge data
To actually import the extracted badges, you will need to use Advanced Badge Editor.
and
files.
Injecting the badge data
Finally, to use your badges, you're going to need to inject them.
Introduction
This thread will guide you through on how to get any official badge you could possibly think of, and also how to group each badge into sets.
Setup
Before starting, you're going to need a few things:
- A modded 3DS with boot9strap
- Simple Badge Injector (CIA)
- Allbadge Tool
- Advanced Badge Editor
- A way to read your SD card
Assumptions
This guide assumes the following:
- You followed the 3ds.hacks.guide step by step to mod your 3ds, or update your modded 3ds.
- You know some basic understanding of transferring files from your 3DS's SD card to your PC and vice versa.
- Your 3DS has a Nintendo Network account associated (despite it possibly not being needed).
Getting the arm9 bootrom
This will be needed for the allbadge tool, as it is required for decrypting some files.
- Boot your 3DS holding
Start
. This should open GodMode9 - Move to
[M:] MEMORY VIRTUAL
and press
A - Move to
boot9.bin
and press
A - Move to
Copy to 0:/gm9/out
and press
A - While holding
R
, press
Start
to turn your 3DS off
boot9.binfile should now be on your SD card inside of
/gm9/out.
Getting the badges
Having obtained the arm9 bootrom, you can now use the Allbadge Tool.
- Make sure your
boot9.bin
is in the same folder as
allbadge_tool.exe - Open
allbadge_tool.exe - Select the versions you wish to download
ex.: EUR v131 - Click the begin button
- Wait until everything is done
- If any error occurs, make sure to read what the error says. If it's something you can solve manually, do it so. Report any other weird errors to me
- Once done, you should have zip files for the badges you want inside a
data
folder - You may want to extract the folders for the sets you want
This is not usually needed, but may include badges that are otherwise missing on the other files.
- Move this GodMode9 script to the
/gm9/scripts
folder on your SD card - Boot your 3DS holding
Start
. This should open GodMode9 - Press the
HOME
button - Nagivate to
Scripts...
>
BadgeExtractTool - Select the desired options from here
- Select
Exit
and press
A
once you're done - While holding
R
, press
Start
to turn your 3DS off - Take any
pc_REGION.sarc
file from the
/gm9/out
folder on your SD card and move them to the
data
folder of the Allbadge Tool - Running the Allbadge Tool, you can now make use of the
pc REGION
options to extract their contents
Installing Simple Badge Injector and knowing your NNID
To inject any badges, you will need to know your NNID.
- Move the
SimpleBadgeInjector.cia
to your SD card - Boot your 3DS with the SD card inside
- Open
FBI - Install the
SimpleBadgeInjector.cia - Close
FBI - Open
Simple Badge Injector - Your NNID should be displayed, take note of it on your PC
- You can shutdown your 3DS
Creating badge data
To actually import the extracted badges, you will need to use Advanced Badge Editor.
- Open
Advanced_badge_editor.exe - Go to
File
>
New data - Type your NNID in the respective field
- An alternative to this process could involve using the Simple Badge Injectorto dump your own
BadgeData.dat
and
BadgeMngFile.dat
files - In that case, use
File
>
Open data
and select the folder where those files are
- An alternative to this process could involve using the Simple Badge Injectorto dump your own
- Go to
Import
>
Entire set data (*.prb and *.cab) - Select the set's
.cab
file - Select the set's
.prb
files (you can select multiple) - Click
255 of each badge
for essentially all the badges you need - Go to
File
>
Save data to... - Select a folder to save the badge files to
- You can close the app
BadgeData.datand
BadgeMngFile.datfiles.
Injecting the badge data
Finally, to use your badges, you're going to need to inject them.
- Move the
BadgeData.dat
and
BadgeMngFile.dat
files to
/3ds/SimpleBadgeInjector
relative to the SD card's root - Open
Simple Badge Injector
on your 3DS - Select
Dump badge data
. This will backup any badge data you might have (optional) - Select
Create ExtData archive 0x14D1
and press
A - Select
Inject custom badge data
and press
A- In case any unexpected errors occur, please report them to me
- Return to the home menu