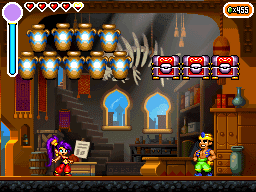
With the recent release of the prototypes from Shantae: Risky's Revenge, I figured there aren't a lot of people out there that know how to emulate and run DSiWare prototype games and applications. This tutorial shows step by step how to do that from scratch. Note that this is just for DSiWare applications, not DSi cartridge applications or prototype Nintendo DS applications.
Prerequisite:
- A Nintendo DSi to dump system files from for emulation. If you don't have one, Google is your friend.
- An SD card (512MB is enough).
- melonDS. You can either use the latest release or use the latest artifact (though they can be a little unstable).
- The Memory Pit exploit (download this if you have a Facebook icon in the gallery, download this if you don't), hbmenu and Unlaunch.
- dsibiosdumper and fwTool.
- maketmd (optional, depends on how you want to run applications).
If your Nintendo DSi is already modded and has Unlaunch installed, you can skip Memory Pit preparations and jump straight into dsibiosdumper and fwTool.
- Prepare your SD card by creating the following folders from root: private/ds/app/484E494A/.
- Copy pit.bin to 484E494A.
- Open / extract the hbmenu's zip file. Copy BOOT.NDS and paste it on the root of the SD card.
- Open / extract the Flipnote Lenny and dsibiosdumper zip files. Copy fwTool.nds and dsibiosdumper.nds and paste it somewhere on the SD card.
- Your SD card is all set. Take the card out of your PC and insert it in your Nintendo DSi.
- Go to the Nintendo DSi Camera, tap SD Card and go to the album. If done correctly, the app will boot into the hbmenu.
- Open dsibiosdumper first. In the application, press X to dump the DS-mode firmware and Y to dump the BIOS. Press SELECT to exit back to the hbmenu.
- Now open fwTool. In the application, select Backup DSi NAND by pressing A on each item. The DSi NAND Backup may take a few minutes to complete. The reason we're doing this via fwTool is because dsibiosdumper does not include the no$gba footer (which contains the ConsoleID or CID), which is necessary to boot the NAND on an emulator.
- When done, select Exit and insert the SD card back in your PC. New folders by the name of dsidump and FW############ (# being followed by numbers) should contain all the necessary files to boot. Save these to a folder on your PC, preferably together with melonDS' files for easy access.
- Open melonDS. The first thing you want to do is going into Config > Emu settings.
- Under General, switch the console type to DSi (experimental) and make sure to uncheck Boot game directly.
- Under DS-mode, check Use external BIOS/firmware files and locate the files bios9.bin and bios7.bin respectively. You can leave DS firmware empty, as we're not emulating DS-mode here.
- Under DSi-mode, locate the files bios9i.bin, bios7i.bin, dsfirmware.bin and nand.bin.
- Check Enable DSi SD card and Sync SD to folder. Create a new folder for your virtual SD card. This folder will act as a root folder. If files don't appear on your SD card in the emulator, you've exceeded the image's size. You can either increase it by changing it or deleting a few files.
Now is time to install Unlaunch. Unlaunch will bypass the DS Whitelist and allow you to run games from other regions or have invalid title ID's. The most reliable way to launch Unlaunch (as of writing) is with Memory Pit and hbmenu. If your Nintendo DSi is already modded and has Unlaunch installed, you can skip these steps.
- Copy hbmenu's BOOT.NDS to the root of your virtual SD card folder.
- Open / extract Unlaunch's zip file. Copy UNLAUNCH.DSI somewhere in the virtual SD card folder and rename the file to UNLAUNCH.NDS.
- Now to go File > Boot firmware. Launch the Memory Pit exploit by going to the Nintendo DSi Camera and going to your SD card's album.
- Open the Unlaunch installer. Select Install now and wait for the installation to finish. Once done, select Power down.
There's two ways you can load games with this setup:
- Drop the .nds or .srl on the virtual SD card and boot them via Unlaunch (games will not save). This is just a matter of dropping files in the virtual SD card folder.
- Add the game on the DSi's Menu. This will be explained here in detail.
- Go to System > Manage DSi titles and select Import title....
- Under Executable, select the .nds or .srl of the application you want to install.
- Install a .tmd file.
- If you have a .tmd file, highlight From file and select the .tmd.
- If you don't have a .tmd file, but the title ID matches that of a title released on the Nintendo DSi Shop, highlight Download from NUS.
- If you don't have a .tmd file, and the NUS download gains no results, use maketmd by dragging & dropping the ROM in the maketmd application. Then, highlight From file and select the outputted .tmd.
Congrats! You can now play prototype / development DSiWare games and applications on melonDS.


